Dystopian Beauty

‘the sea had just scattered the remains across the beach’

2020 has been a very strange year, and sometimes we just needed to escape, and for me that means the seaside.

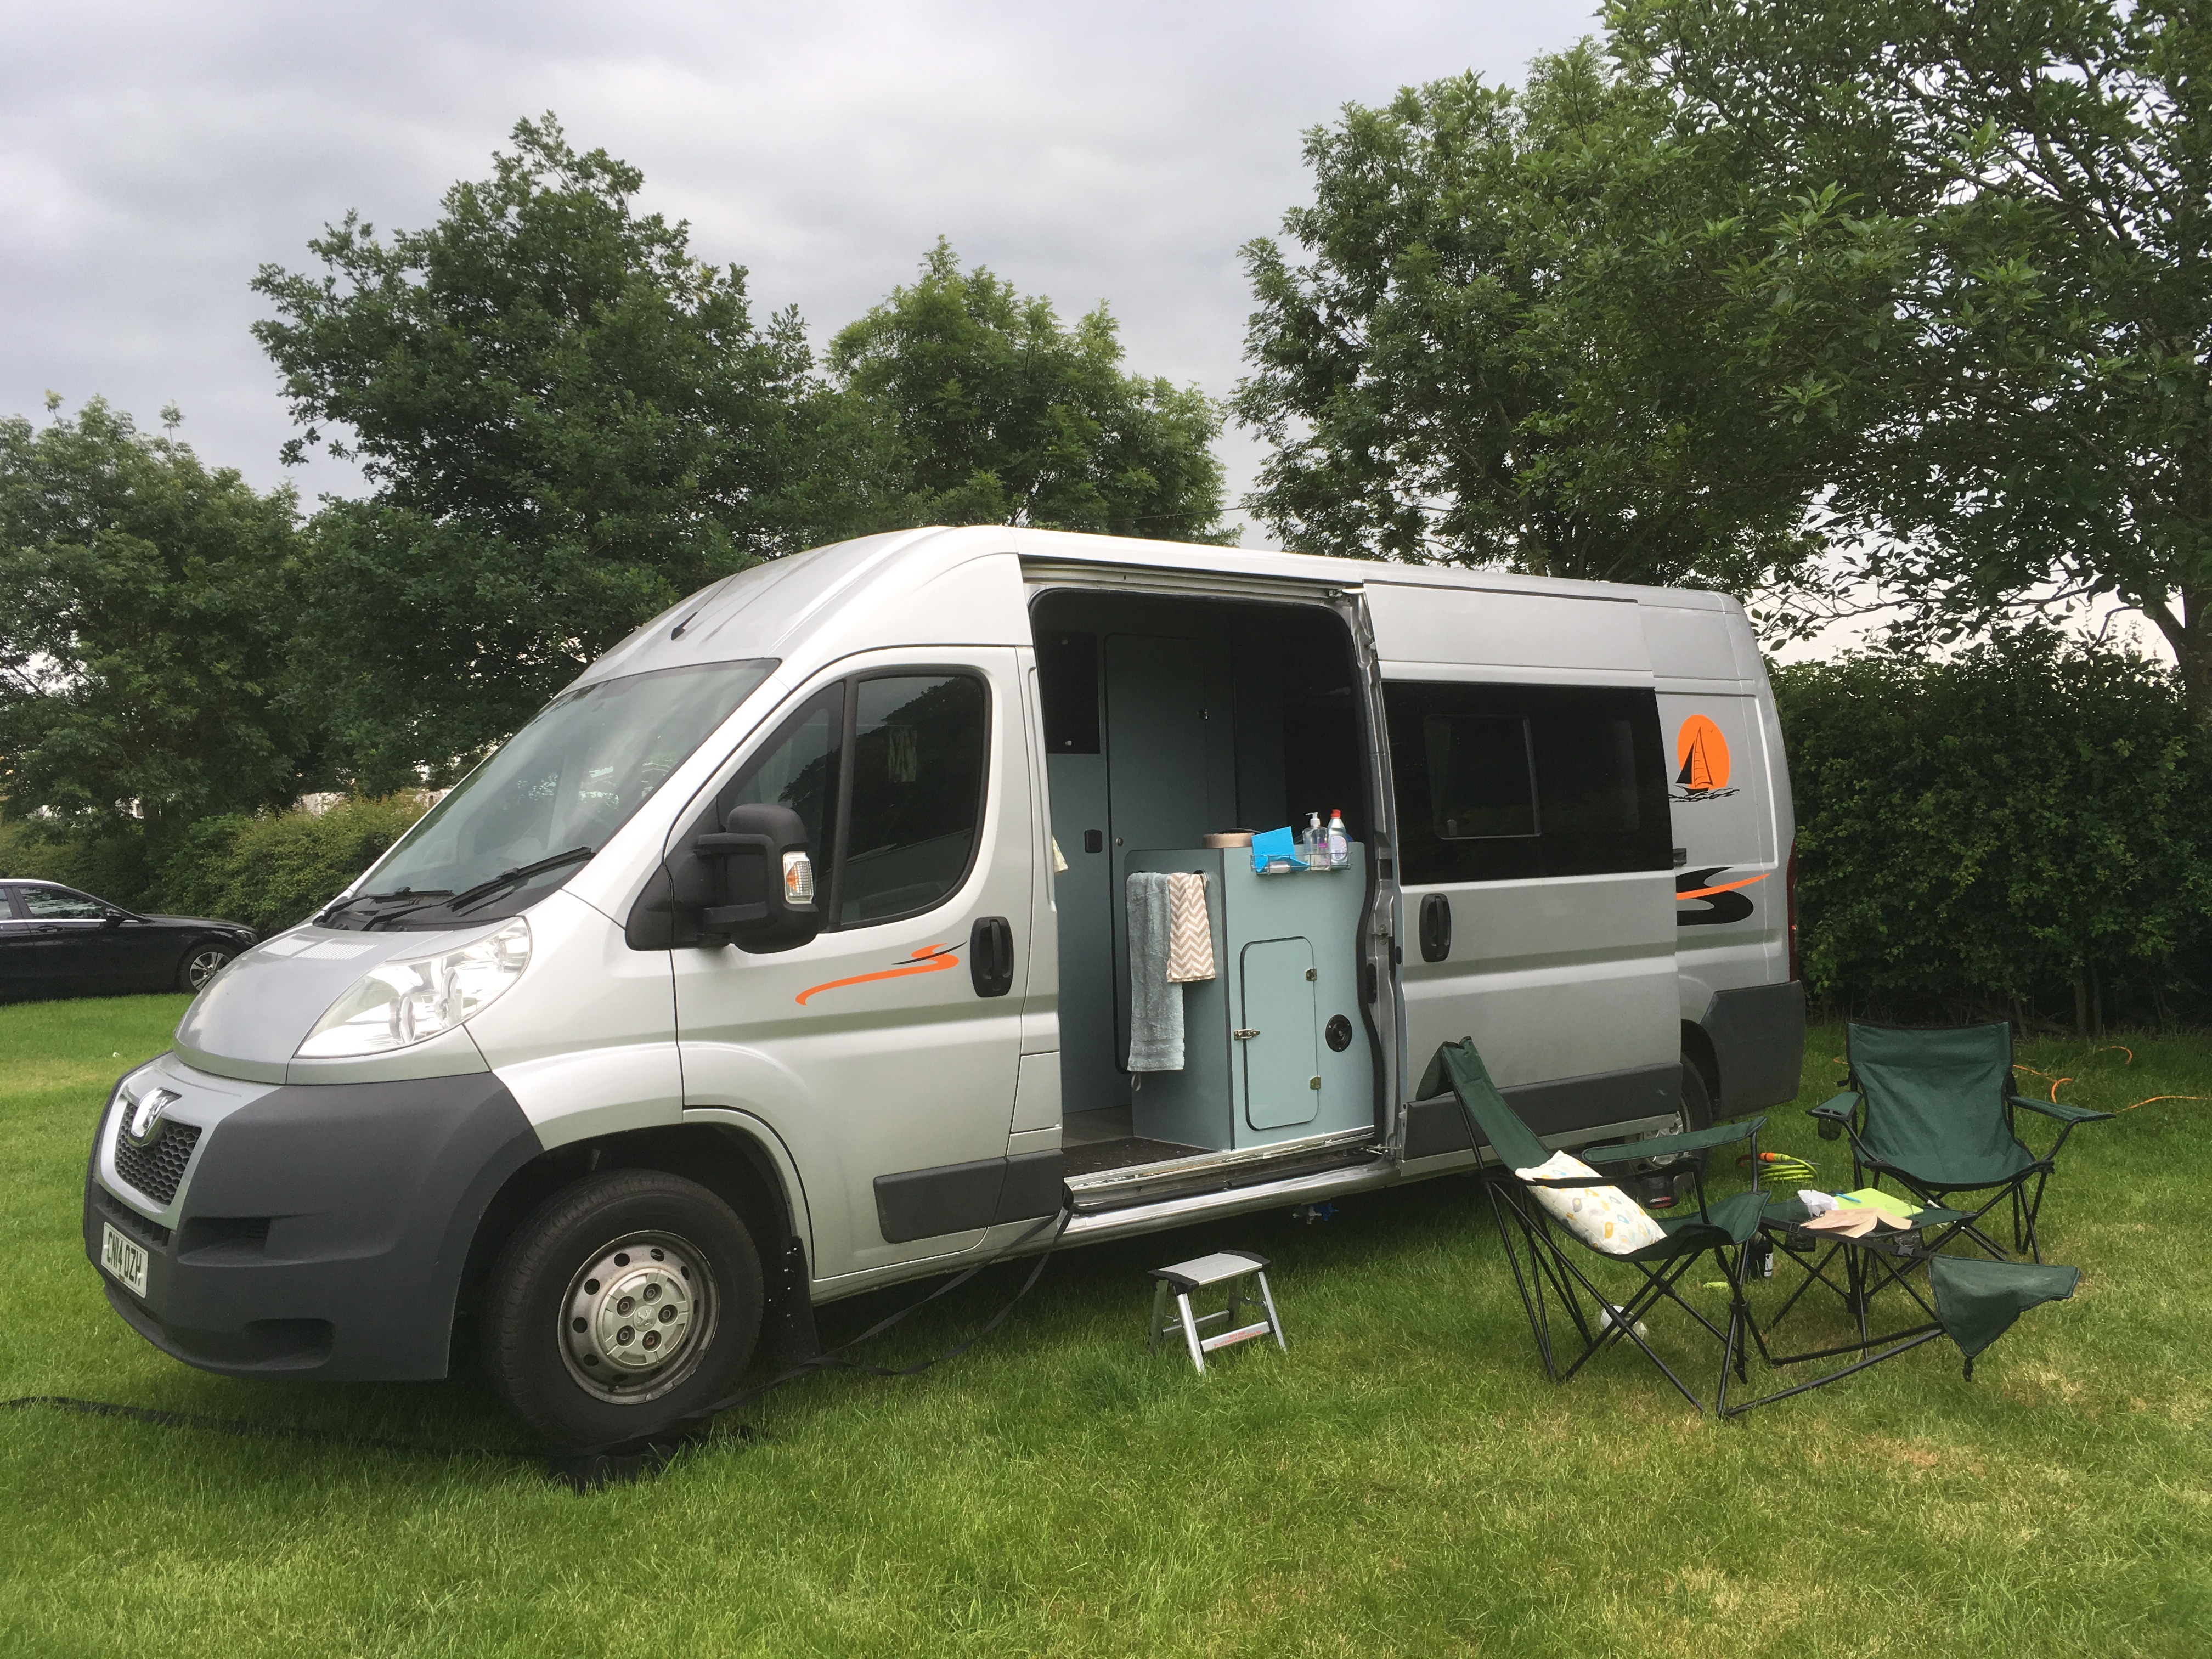
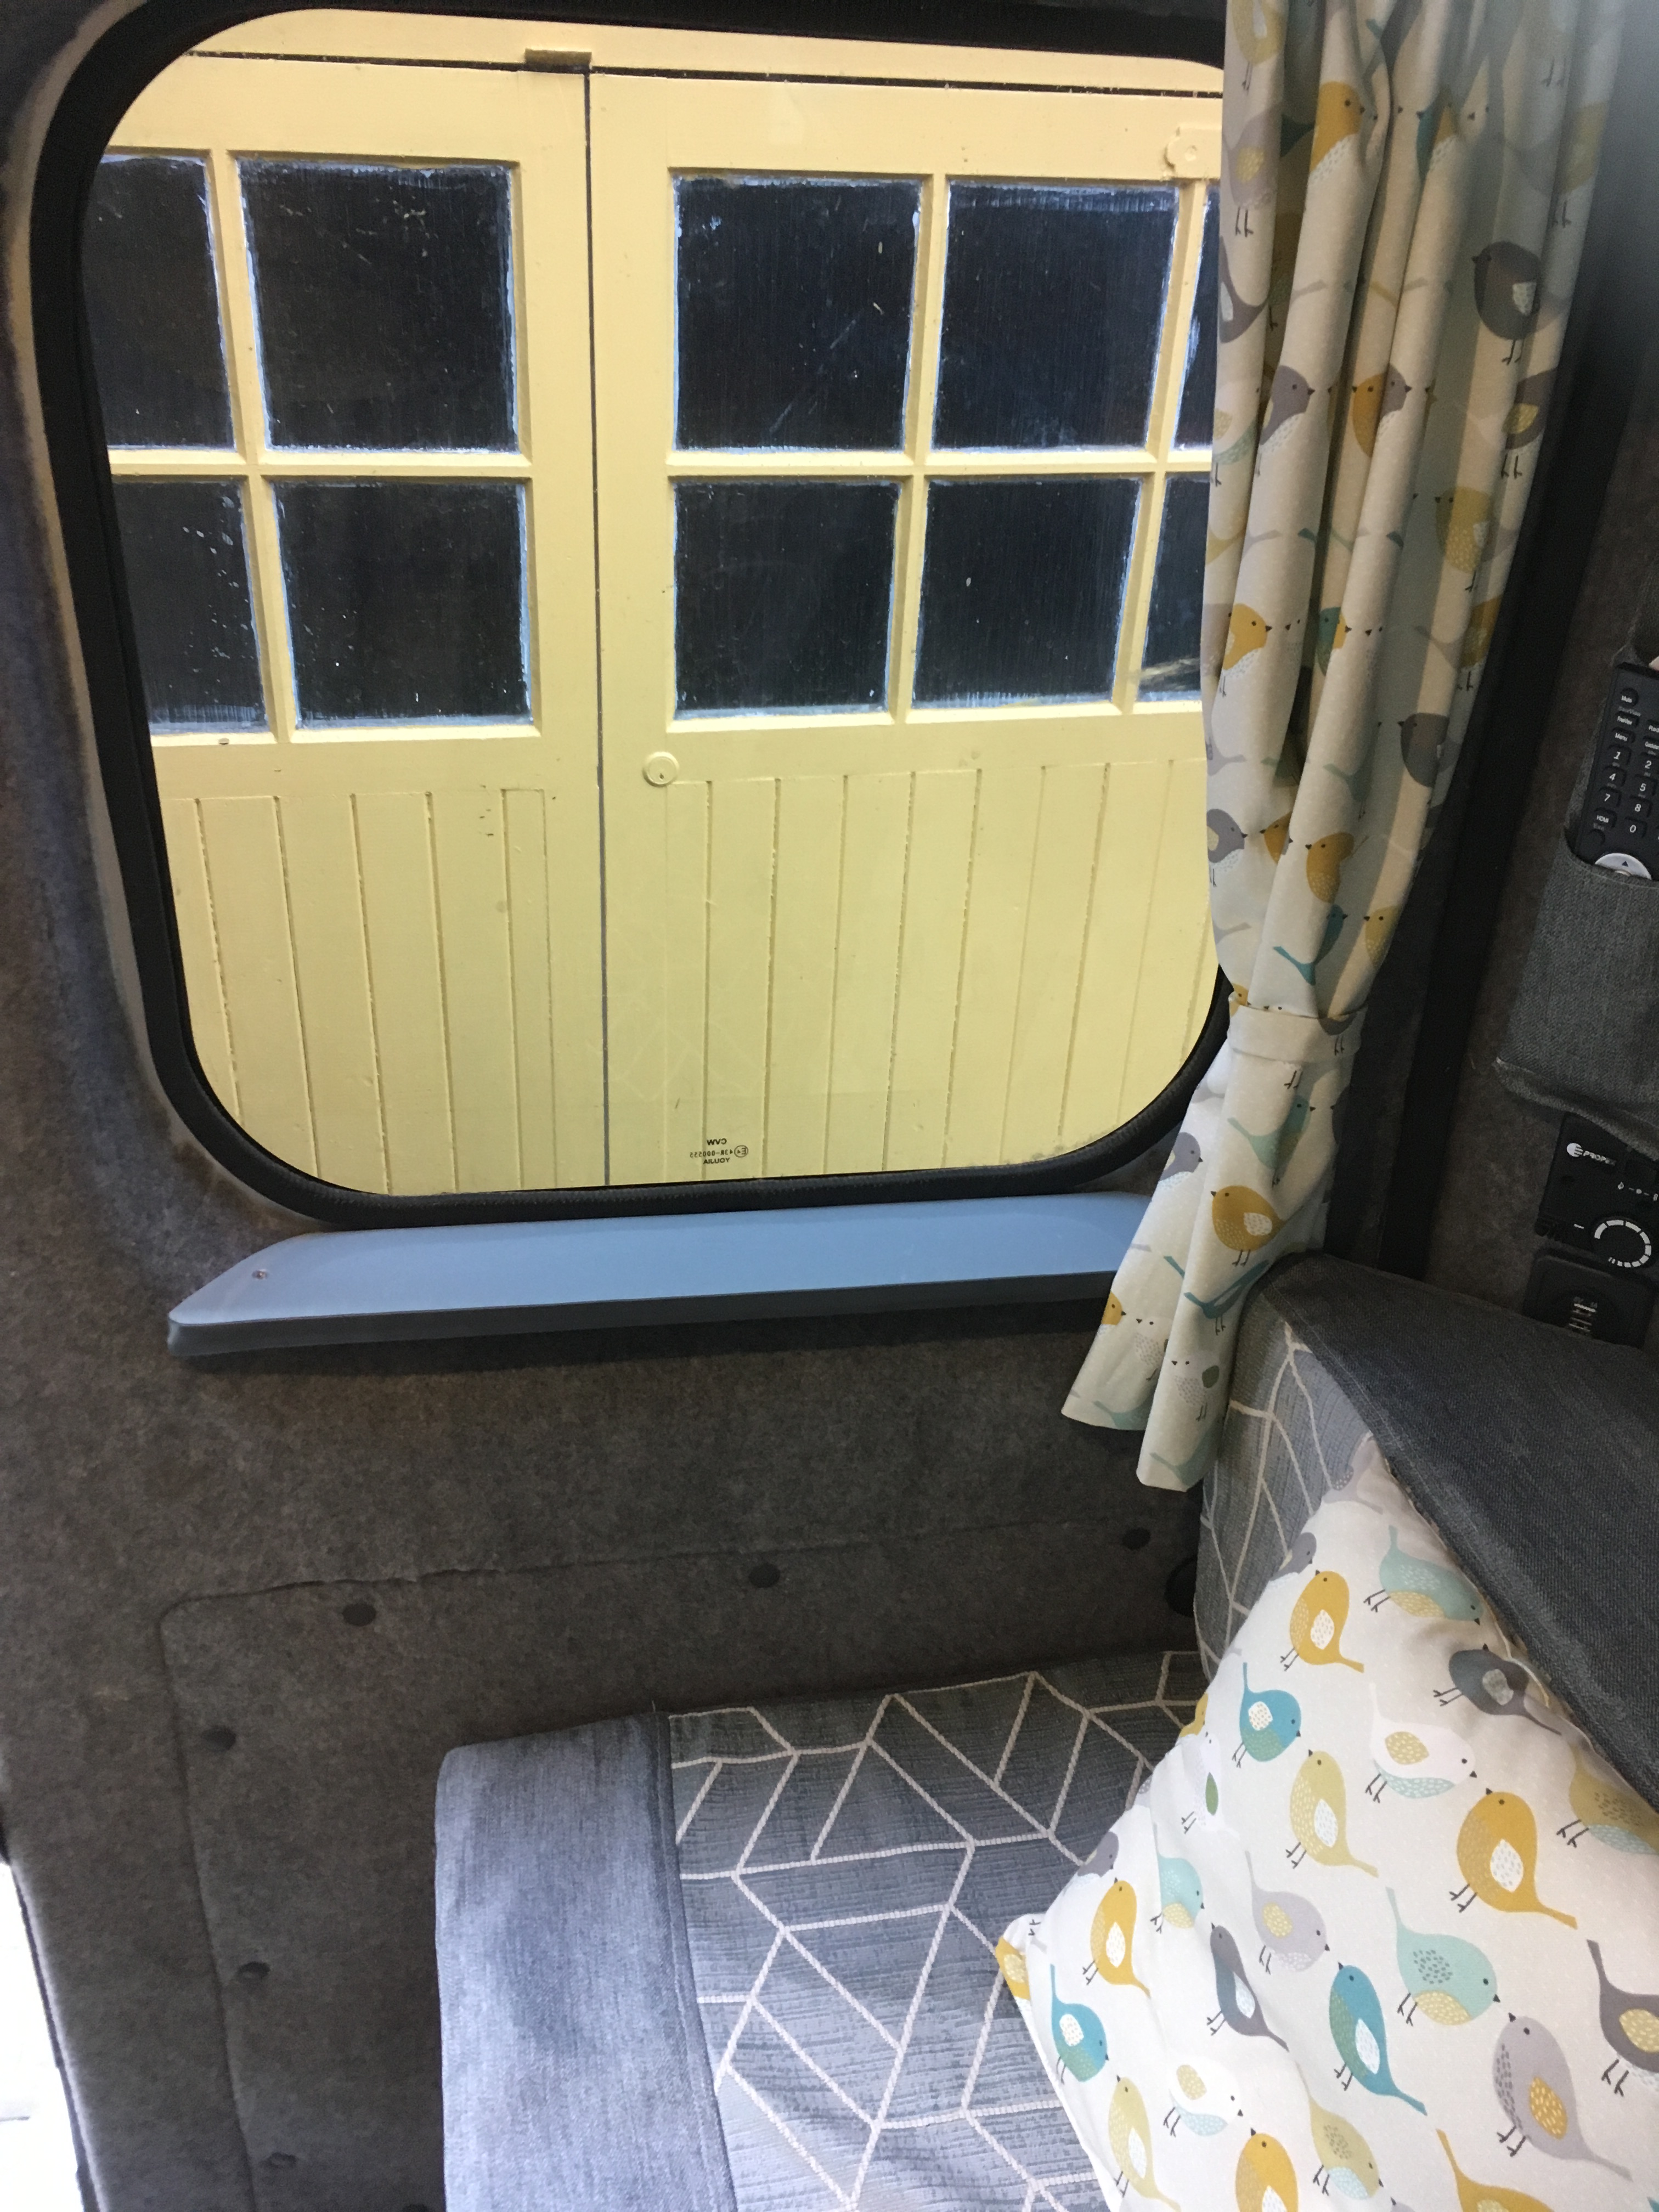
Our campervan has not been used much this year, so we decided on a few days trip mid September. Our normal breaks take us westward, so for a change we opted to go North Easterly to the Yorkshire coast, to places we had not been to before.

As we were booking late, and due to Coronavirus, many more people were holidaying in the UK, we couldn’t get the first night where we wanted, and opted to stop in Snaith, on the way there. The site was small, and we were the only guests when we arrived, sharing the field with some chickens who soon departed once the dogs were let out.

The site had caught my eye as the pillars from an old bridge remained in the river behind the site. So we went to have a look, but as the banks were overgrown and fenced off, we only got distant views.

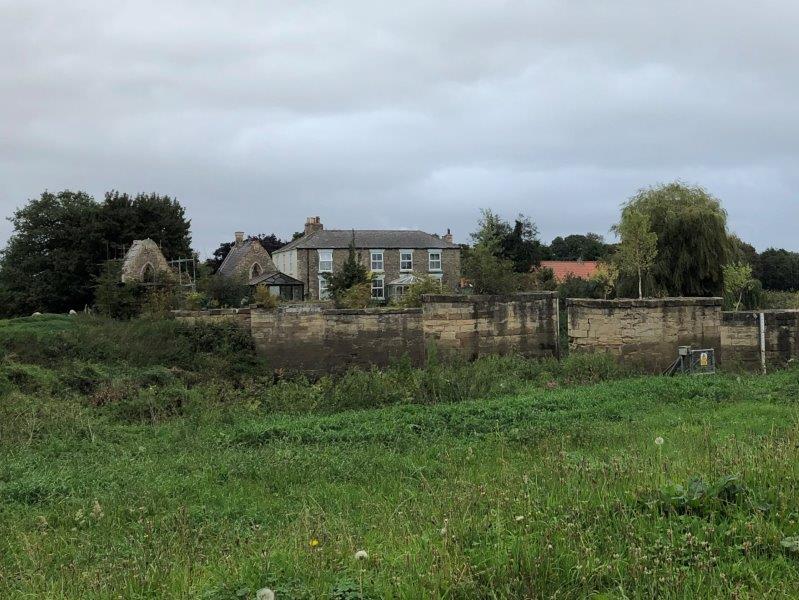
This used to be a toll bridge, charging an awful lot of money to cross when it was built. The 2 small church like building across the river are the toll booths.

We carried on our walk with a visit to Snaith town. To get to the town we passed underneath the road bridge, and a Barn Owl flew out, too quick for a photo.

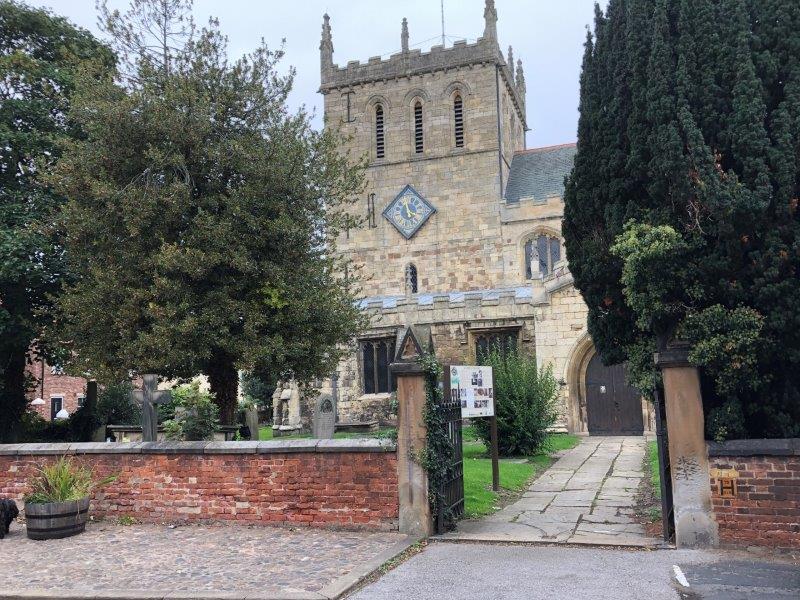
We found a wonderful cake shop, so took a couple of huge yummy cakes back with us for afternoon tea.

The next morning we continued on to Spurn Head, and the Yorkshire coast.

Our campsite was a small tidy site with around 8 other vans. We quickly realised that Spurn Head is a great venue for Bird Watching, as everyone else there seemed to be in Camouflaged clothing carrying huge binoculars and cameras.

A quick check of Google told us that a rare sighting of a Rosy Starling was todays excitement, but as we only had small binoculars with us, we left that to the twitchers.

If you don’t know the area, Spurn Head is the long strip of sand and dunes the curves around the end of the Humber estuary, and is one of the most easterly points on this part of the coast, which is why random birds appear here, having been blown across the North Sea.

As we had arrived early, we set of for a stroll by the sea, after all, that’s why we were here. Dogs are not allowed on the main Headland as it is a nature reserve, but we stopped at the cafe for a quick drink, no ice-creams! Then we set off along the beach.

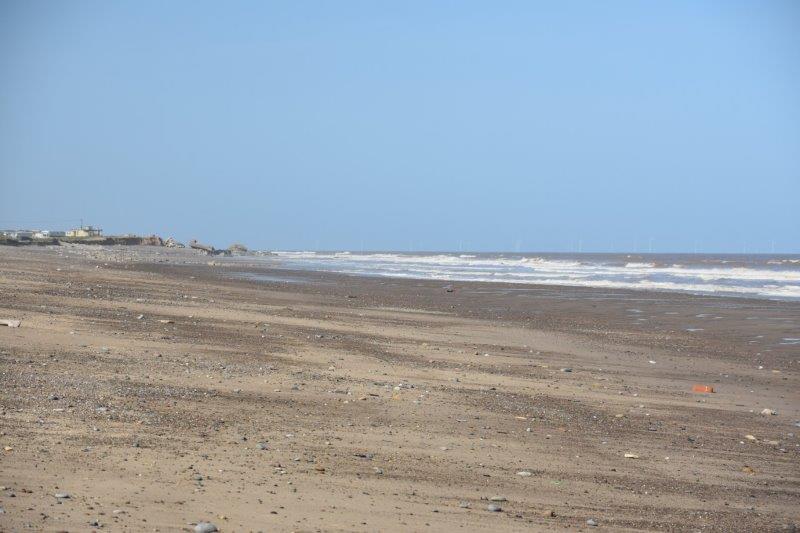
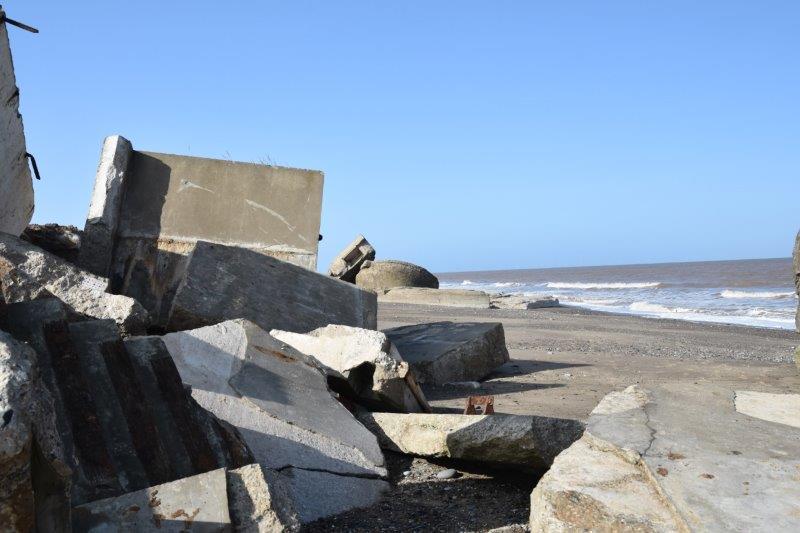
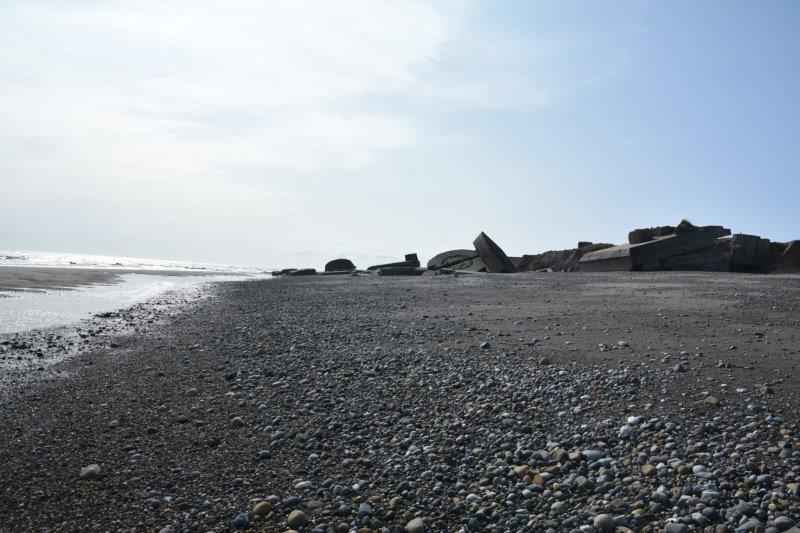
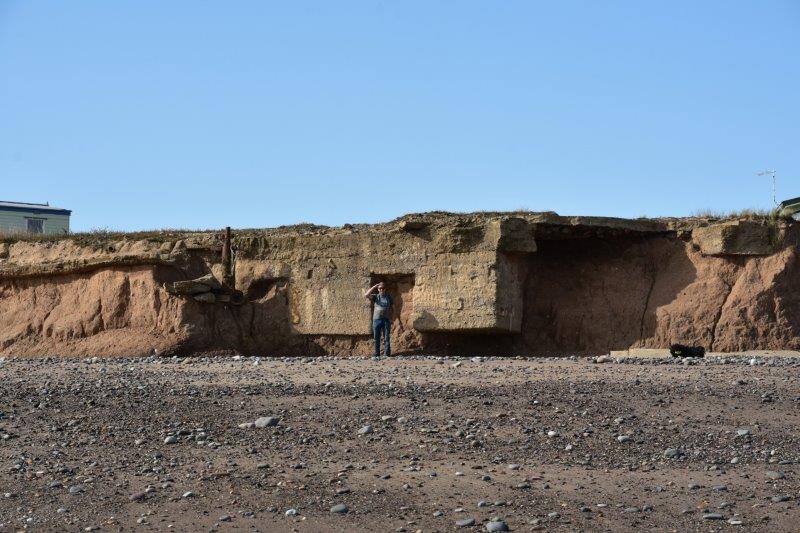
The sea is constantly eroding this part of the coast, moving it ever Westwards. As a result, the beach is now scattered with the ruins of war time lookout building, and the static caravan park is slowly being reclaimed by the sea.

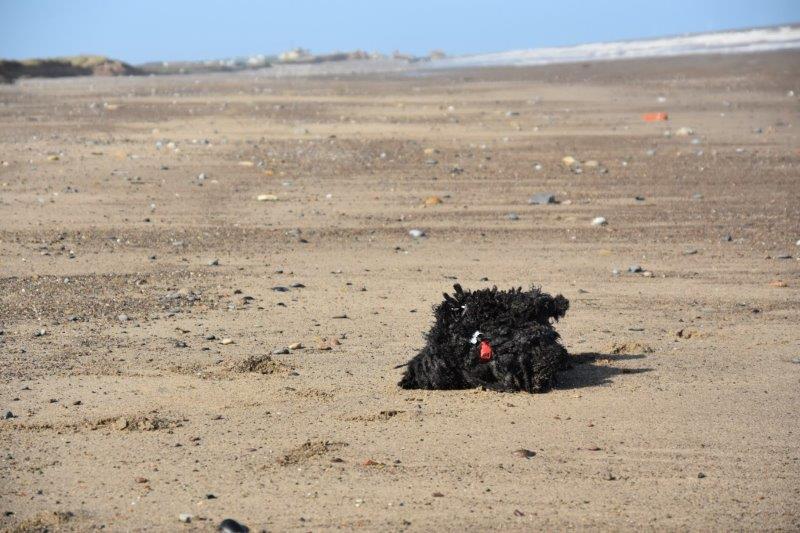
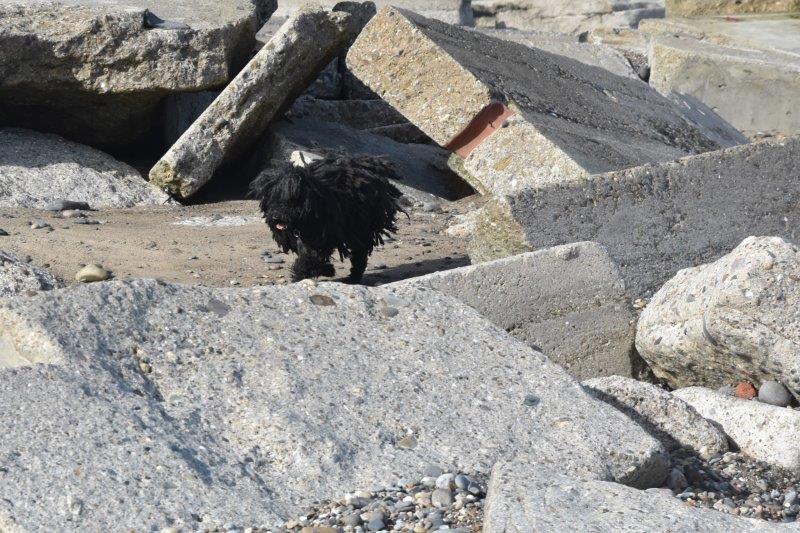
The dogs were glad to be free on the beach, with Rita making sure she collected lots of sand to take back to the van.

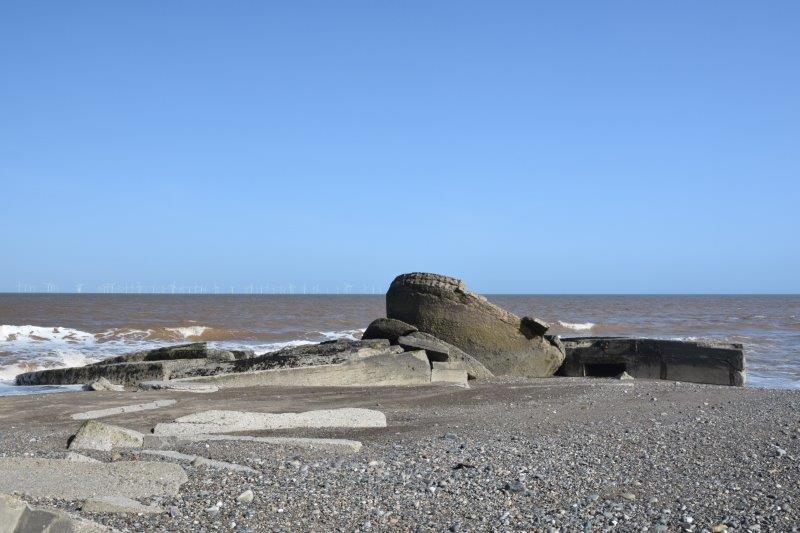
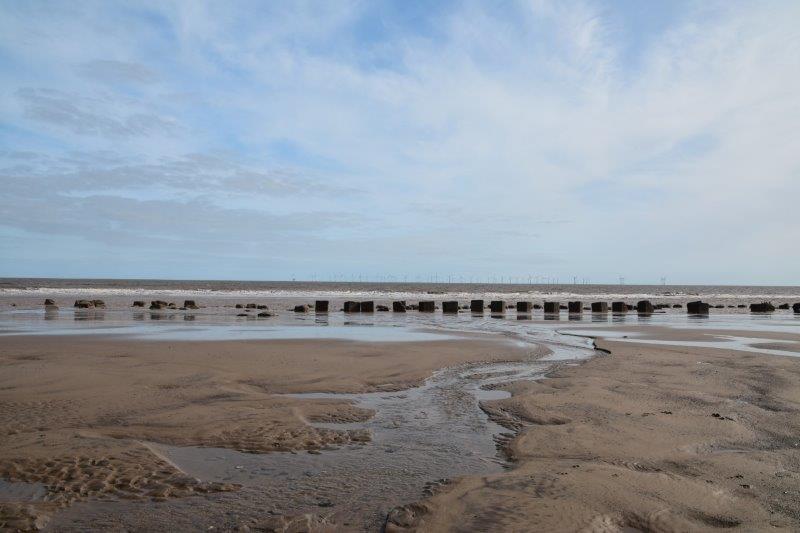
Lookin gout to sea there is a large Wind farm, gently spinning turbines making pretty patterns as they lined up.

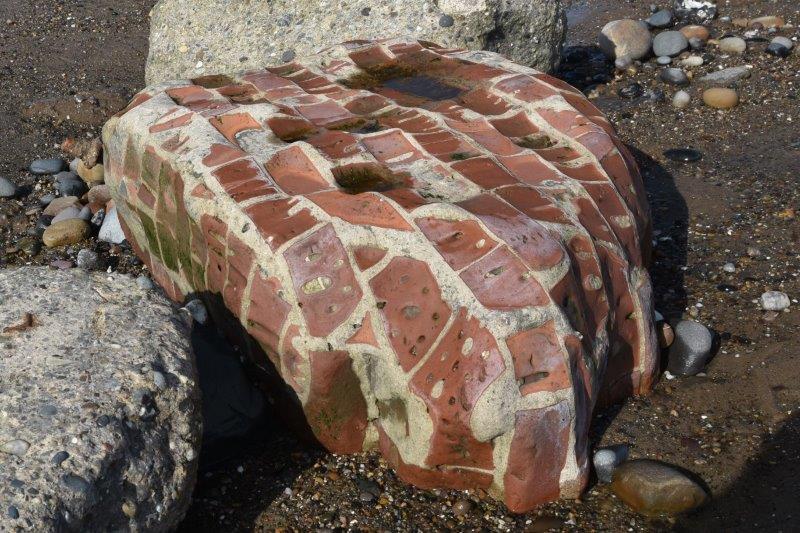
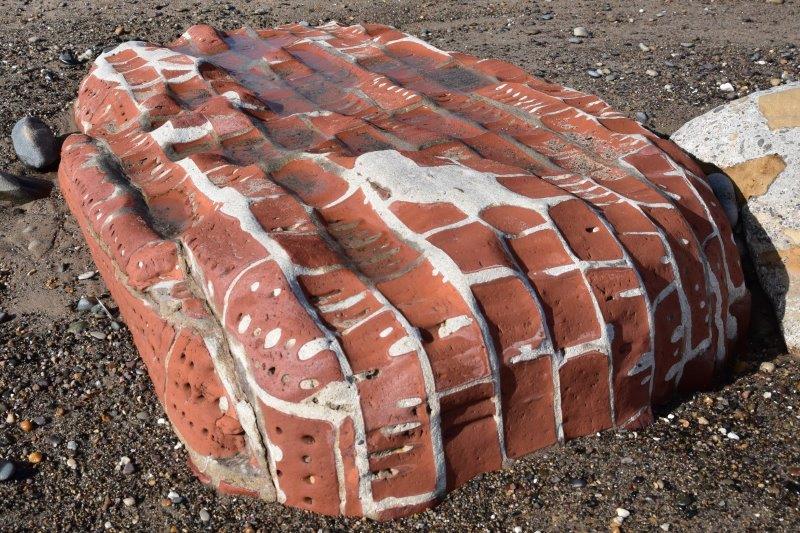
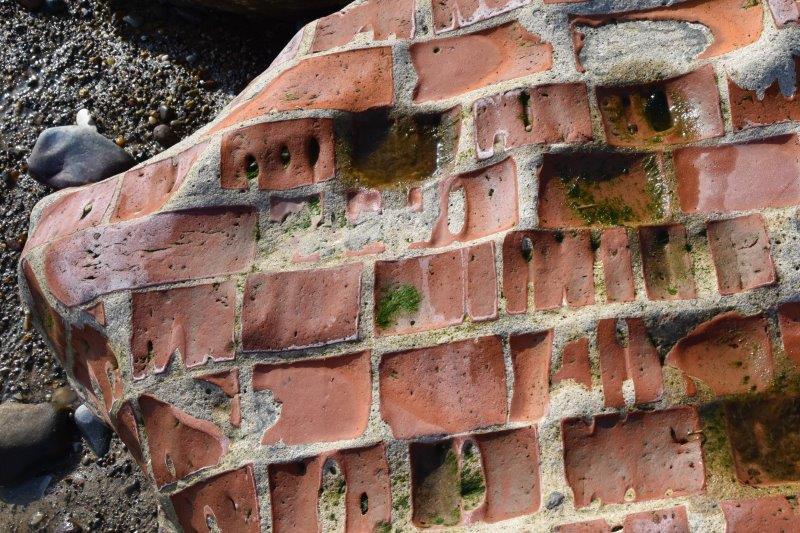
I never imaged lumps of old brickwork could be so beautiful, eroded by sea and sand.

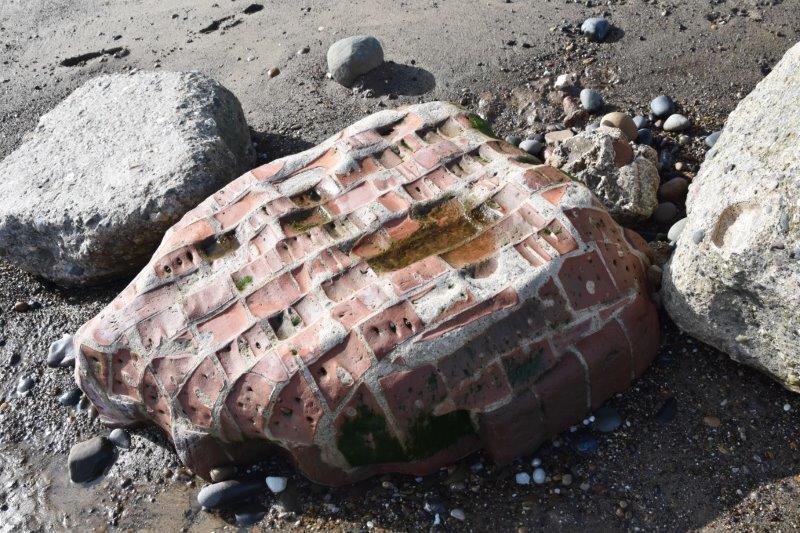
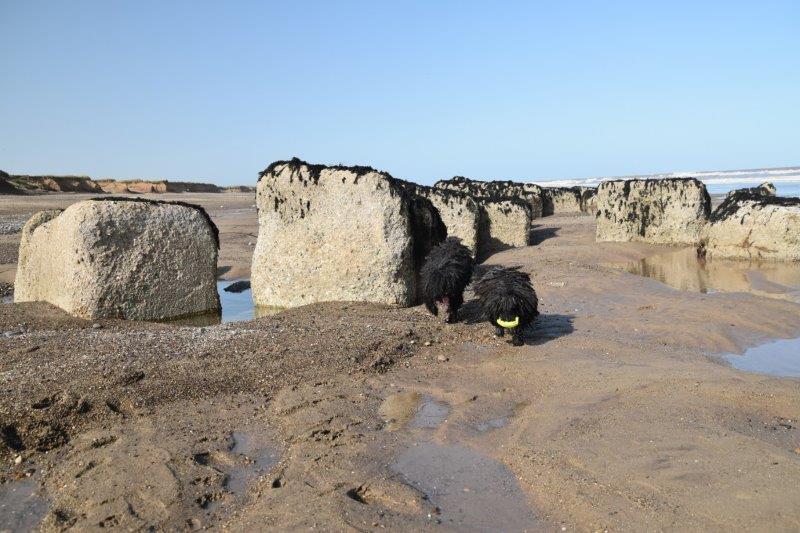
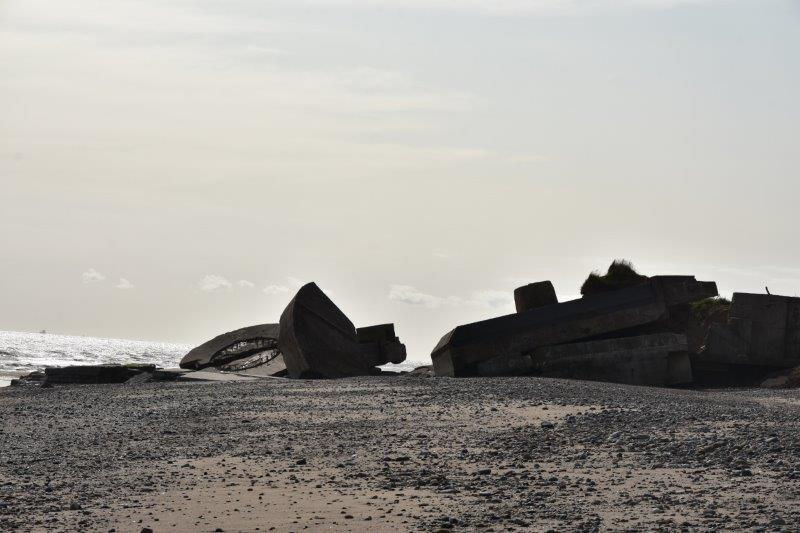
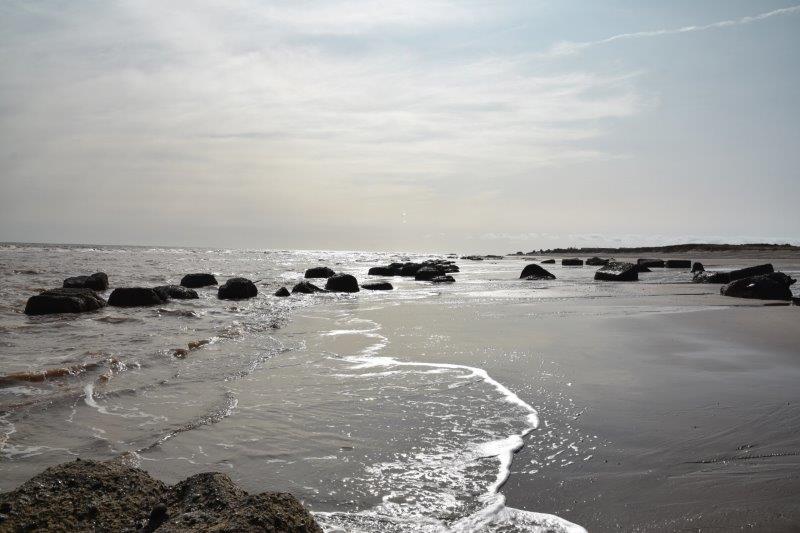
The large concrete blocks are part of the sea defenses. Further along we came to the ruins of WW2 gun turrets.

The first sight of them has a shape that resembles a huge bird, until you venture closer.

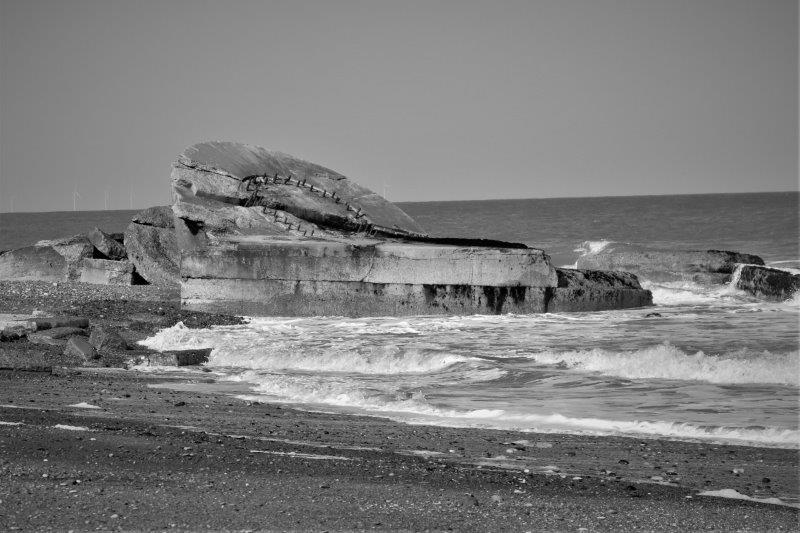
These make for a very dystopian lands scape, and truly show the power of the sea. They were very solidly built to withstand bombing, but the sea had just scattered the remains across the beach, at crazy angles.

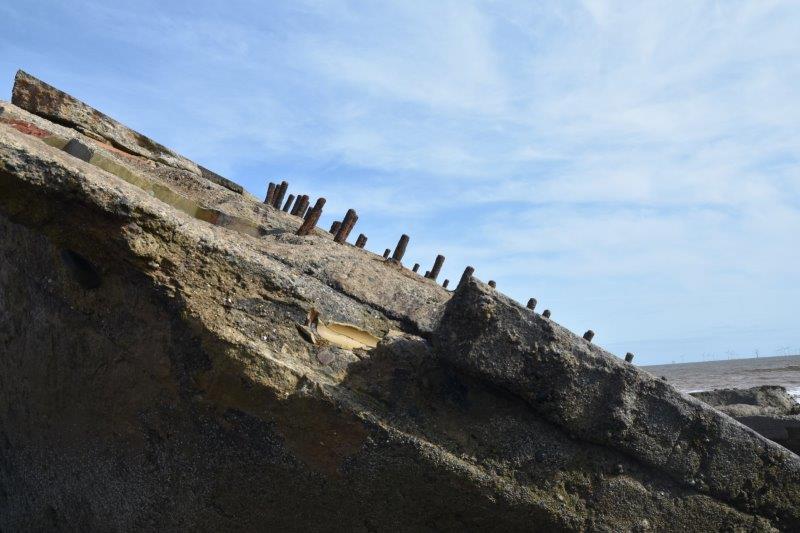
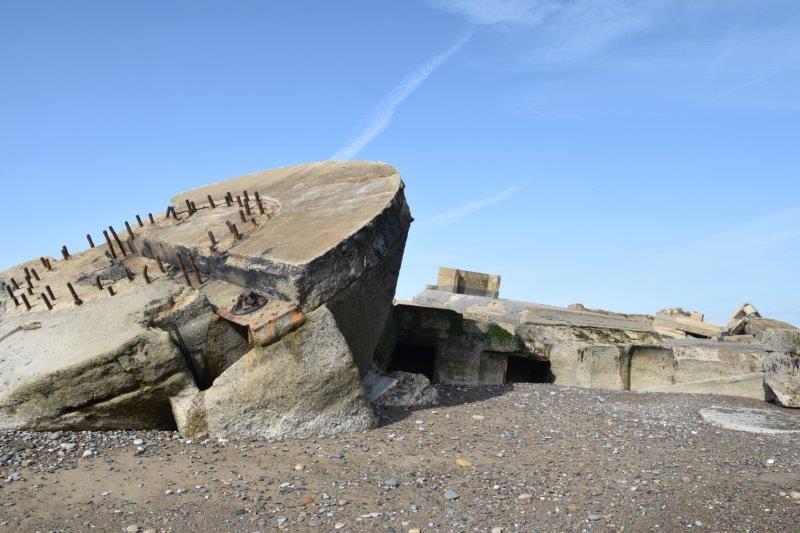
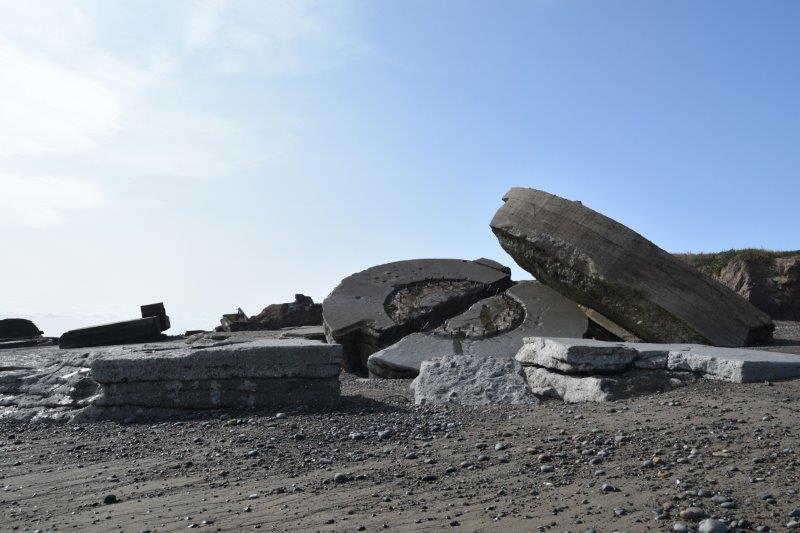
It is an almost alien scene, with crooked staircases going nowhere, and weird round shapes like UFOs.

Eventually I was dragged away to continue our walk, knowing we would return the next day for more photo opportunities.

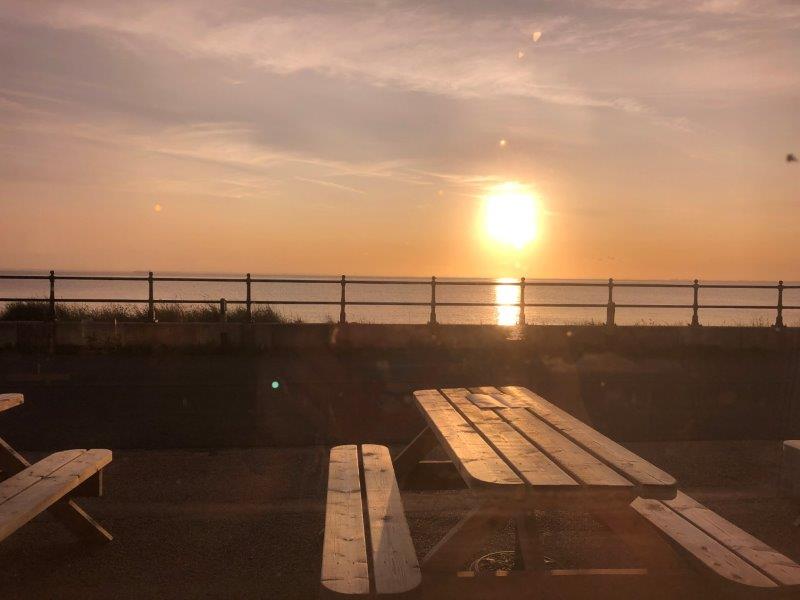
We booked ourselves a meal at the nearby pub, which overlooks the Estuary, facing West, towards Grimsby .

The meal was delicious, and we were treated to their ‘cabaret’ – the sun setting into the water. As I have usually visited the west coast, this feel right – I’m never comfortable with the sun sinking behind me as I look out to sea.

The next day, still hot and sunny, we set off from where we left off along the beach.

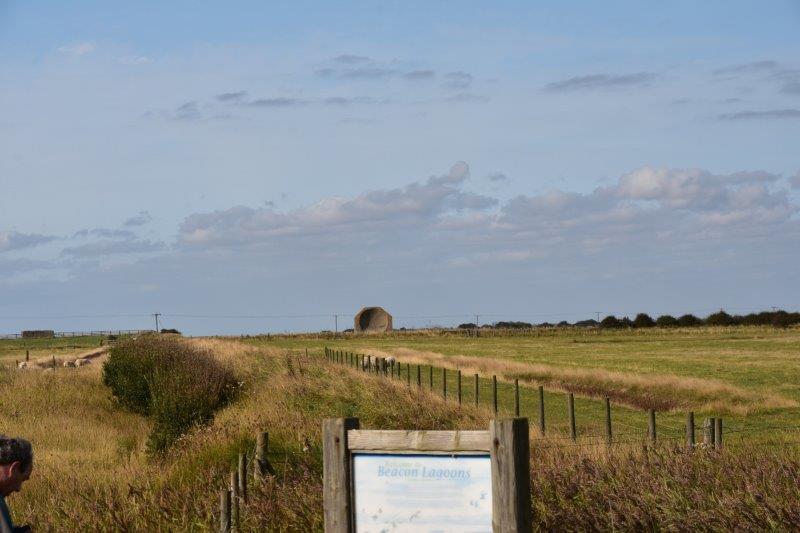
There is a Sound mirror inland a short way, but we didnt find the footpath to it, so only got a distant shot.

The signs of erosion are everywhere, the caravan site had lost a row of plots, and the road hangs over the edge.

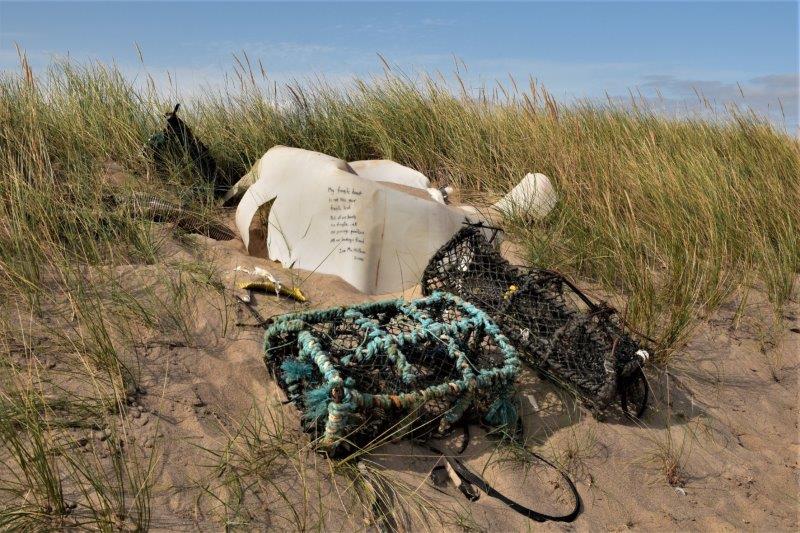
On the dunes we found a ‘sculpture’ of several lobster pots and some rubbish, with a poem written on.

At one point the dogs started barking when they were close to the sea defenses, and I soon realized they had come across a young seal.

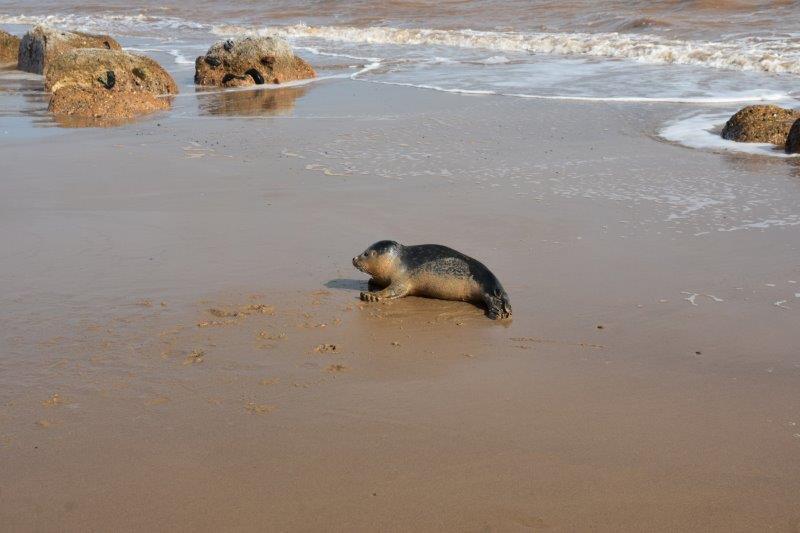
It wasn’t too concerned by them, as I called them away, and it flopped back into the sea.

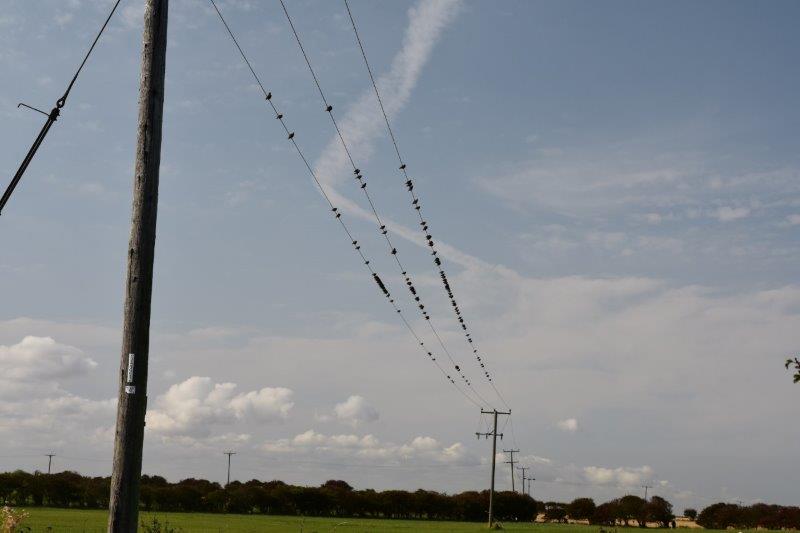
I grabbed a shot of the starlings on the telegraph wires, one of them might be a rosy Starling, but I doubt it.

After another good night, despite me finding a wasp in my cider, and getting stung on my lip, we set off to our next stay. I was for once glad to wear a mask, as my lip and cheek swelled from the sting.

First we called in at Bridlington, a very typical seaside town, all rocks shops, arcades and tacky souvernirs.

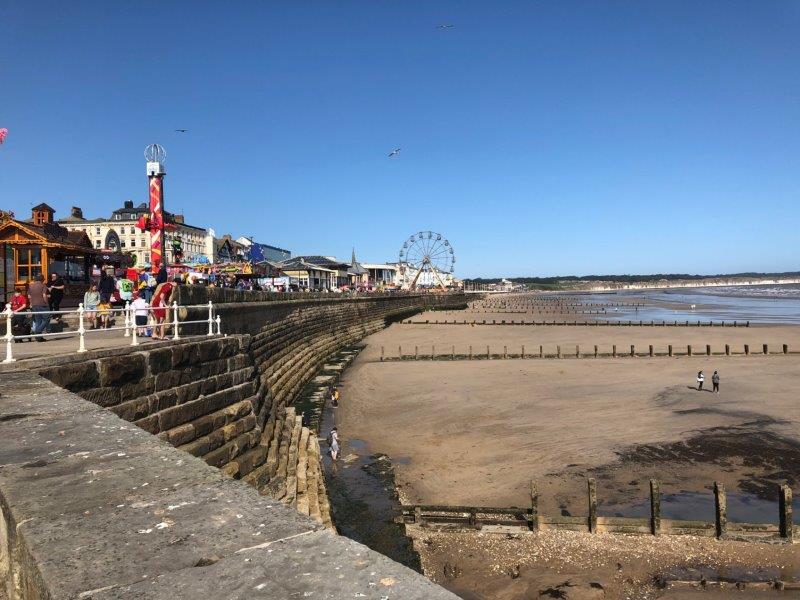
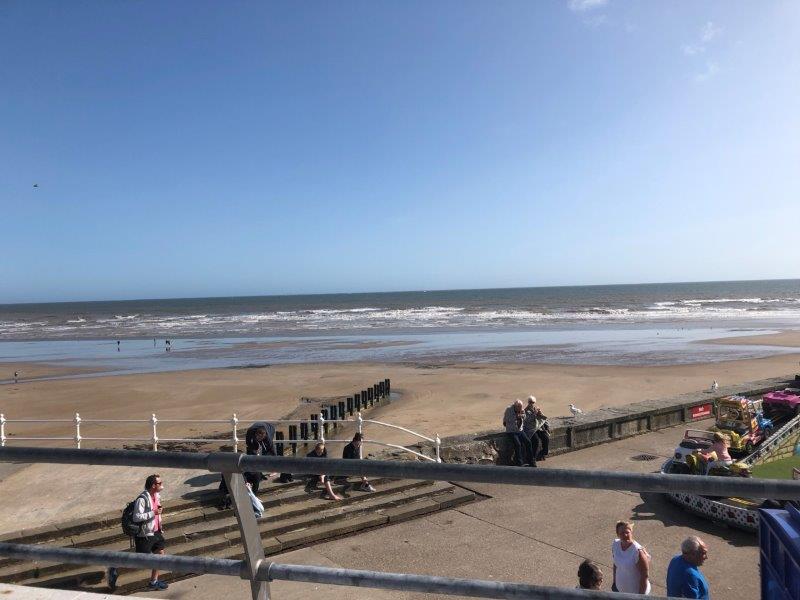
We just had to stop on the prom for fish’n’chips, and took a stroll around town. It was busy due to the lovely weather, but the breeze was a bit brisk.

Our final site was on Flamborough Head, just round the coast.

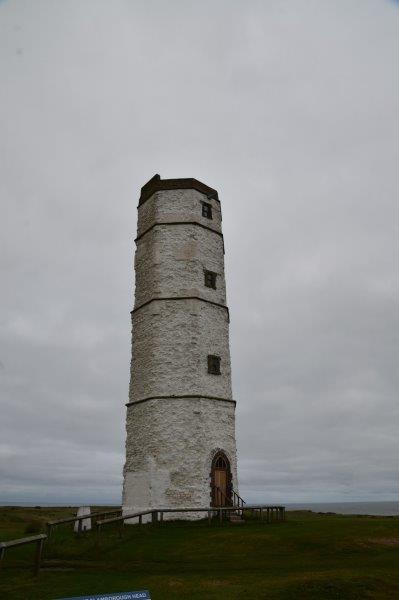
The next day we walked from our site to the lighthouse on the Head, passing the old Chalk tower, which was the first lighthouse here. But the charges for this service were voluntary, so it quickly fell into disrepair.

The Greenwich Meridian crosses the head and is marked by a plaque. This can be confusing, as many maps of Britain are tilted, so you would imagine it passed further inland than this.

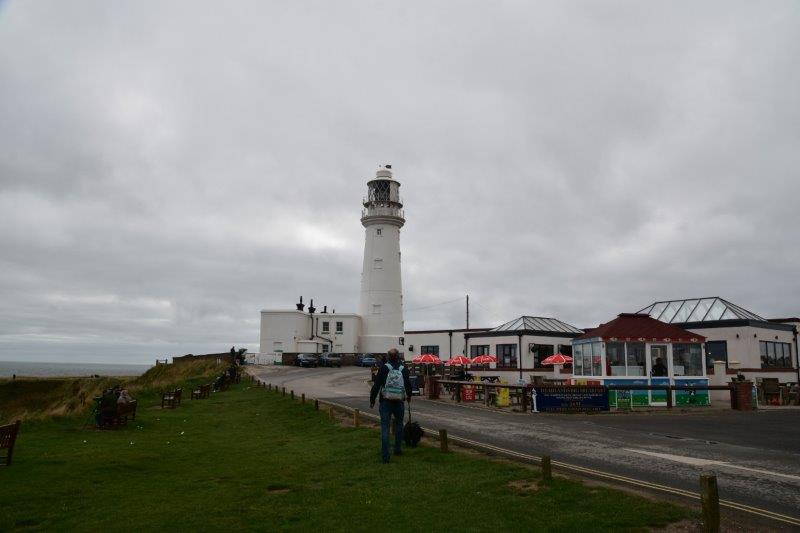
The modern lighthouse is now a popular destination for more bird watchers and has a small cafe. It also has a shop where I found a souvenir pencil for my collection and a badge for my camera bag – result.

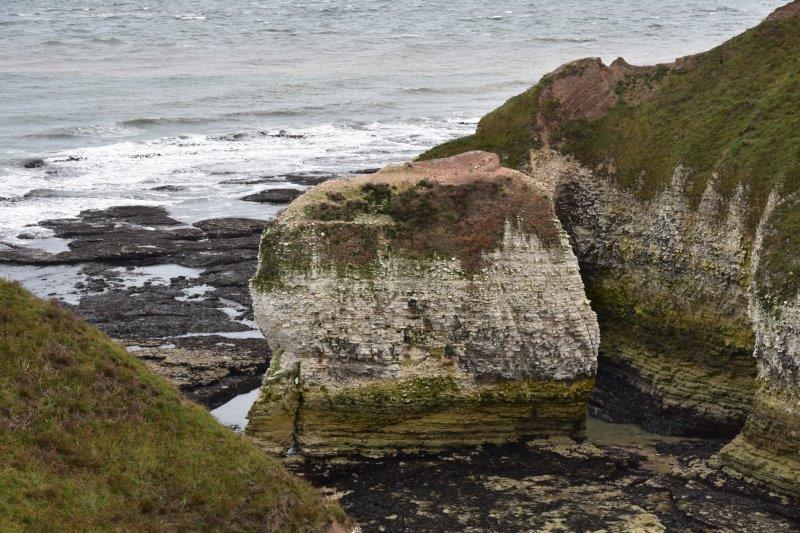
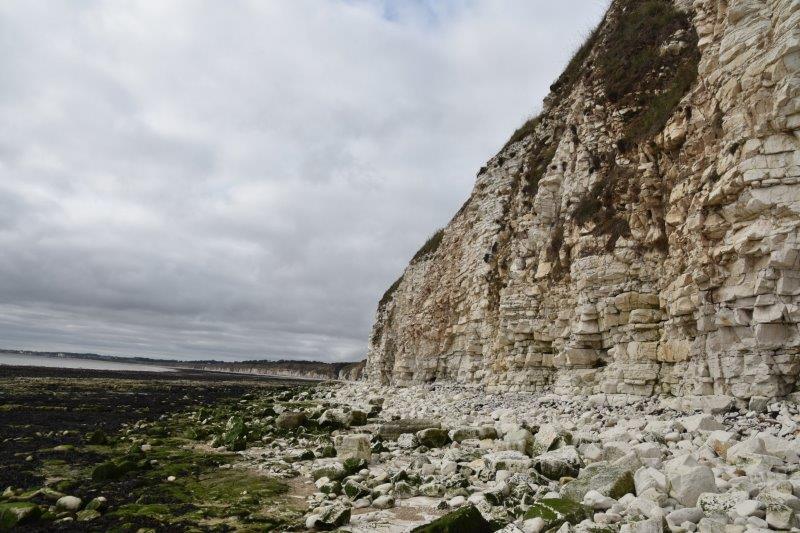
From here we set off round the Southern side of the head, where we could sea bird strewn cliffs.

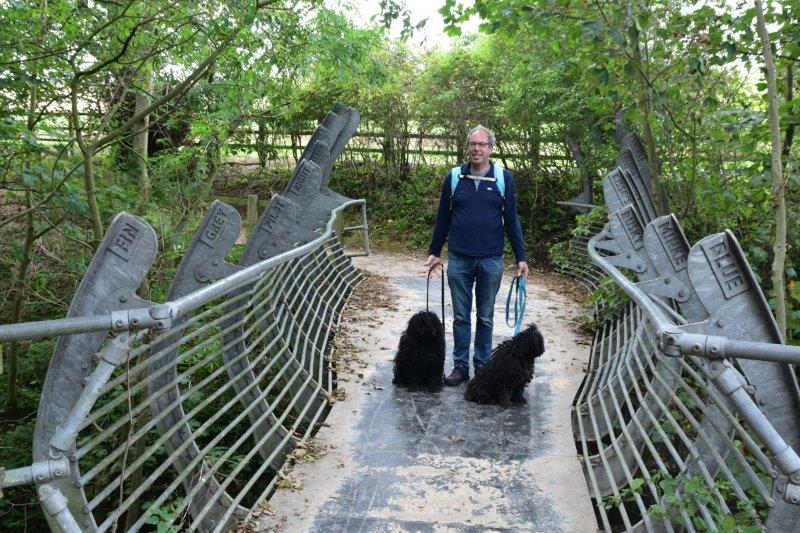
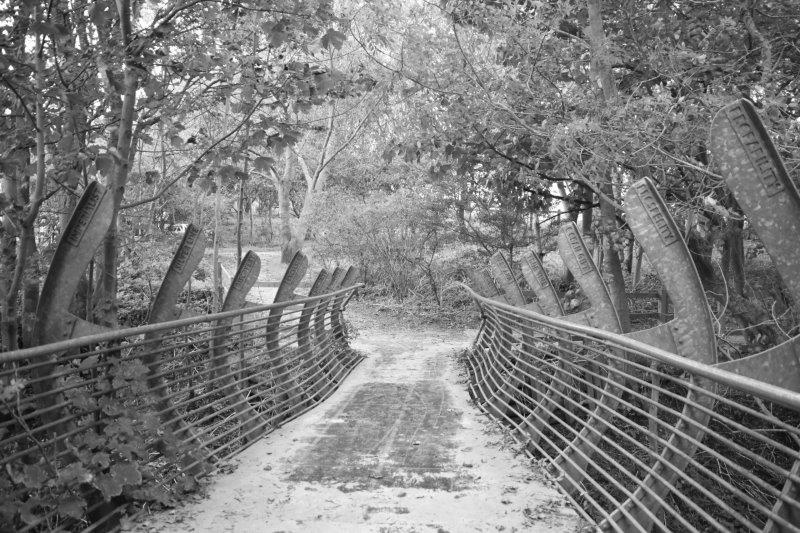
Part of the route passed through a Sculpture park, but is seems most of the sculptures have gone, leaving only a totem pole and a wonderful Whale Bone bridge

The final part of the walk we dropped down to the beach below the chalk cliffs, and then back to the campsite, warmed by the sun, and tired from our great walks.

We were so glad we decided on tis trip, adding new locations to our travels.

Can’t wait for our next trip.

Connie the Campervan

So begins our adventure with Connie


Having taken early retirement. and needing a new project to fill our time, we finally decided to take our son-in-laws advice and buy a van, and convert it to a camper.

With Jason’s help – he works in the motor trade, we found a silver Peugeot Boxer L3H2 van, with side and back windows, and a gas heater and decent mileage. We had decided that a retro cramped van was not our style, and wanted comfort and space, and room for the men to stand up.

So begins our adventure with Connie.

InkedIMG_2576_LI

Our first step to the conversion was a trip to the Camping and caravan show at the NEC, Birmingham, to get ideas. This helped enormously in our final design.

We opted for a bed/settee across the back, kitchen down passenger side in front of side door, and shower room and fridge etc along the drivers side.

So we now had ideas and a van, and we hit Ebay to get stuff, and I mean LOTS of stuff.

IMG_0647

So now we had to start work, so we could reclaim the spare bedroom.

First step was to fit a reversing camera, and Jason and Kirsty replaced the side door window with an opening window as the kitchen would be along that side.

Second step was to remove the existing tatty ply boarding, and start over again with good insulation.

First we put up Dead Mat sound insulation, and this proved worth every penny, as the previously rattly van was now quiet to drive.

Next we put in 2 layers of Celotex insulation, and used recycled Plastic Bottle loft insulation in the small spaces.

At this point the wiring plan had to be completed, and first fix wires installed, making sure wires were fed through struts rather than just behind insulation. Extra wires were also fed through in case the design changed.

We then cut new side panels from 9mm ply and carpeted the panels with light grey carpet lining.

Next step was to fit a bed – we had planned to build one from wood, but when we saw this ready made metal bed we opted for that instead. As we like our comfort, we left space at the back to extend the width of the bed to King size.

IMG_2598

This was firmly bolted to the side panels and to the floor.

Our plan allowed some room for a small hanging space next to the bed and then the shower room. As we had bought a Thetford C402 Cassette toilet, we had to work out where the door would go, and work around that to position the shower room.

Once we knew roughly where it was going, we put up the back wall against the driver side wall of the van, and covered it with white PVC sheeting ( it has a protective blue film at this stage) cut to size.

Then we checked the toilet fitted, and bravely cut a hole in the van for the door.

Well done Jason!

A timber frame was then built around the toilet and shower base, the PVC fitted inside, heating gently with heat gun to bend the top to fit, a ceiling put in place and the walls insulated (for sound!).

Next was fitting the opening roof fan. These are NOT designed for van roofs, but we got there in the end, after our first try leaked. While we were working on the roof, we fitted a Solar panel, so we would not be reliant on mains power.

Wiring for the fan and bathroom light was also fitted at this stage.

Next we had to fit the 15mm lightweight 5 ply laminate boarding outside the shower room.

I had chosen some fabric for the seats, and we were planning on a light grey wood effect panel, but when we viewed the sample I didn’t like the shade as it was too beige, and instead opted for ‘Blue metal’, a duck egg blue laminate with a metallic sheen.

The board is in large 2500 x 1220 mm boards and was not cheap, so first we cut a cardboard template, then transferred that to hardboard, before cutting the board. I found that my circular saw was too rough for the job and resorted to a jigsaw, with good narrow laminate blades.

Then we laid Wood effect laminate flooring for a tough, easy clean finish.

We had bought the recommended drill blade for fitting the t-strip, but found it hard to work with, and it wouldn’t fit into corners, so got a new small router and special t-strip blade. This worked brilliantly, and most of the t-strip did not need gluing.

The light fitting in the shower has 2 settings, bright and dim, so mid night trips to the loo don’t wake the whole site. A standard shower is fitted, with plumbing going out the back wall into the wardrobe.

Next we decided to fit the fridge and microwave, as they were the largest objects lying around. We planned to put the microwave at head height, but once we saw it could fit above the fridge we went with that design. The fridge is electric low powered, so doesn’t need gas, and had a removable ice-box. The solar panel will run the fridge on sunny days.

The microwave can be removed, and the space down the side was made into a 2ltr bottle store, topped off with 18mm worktop in grey.

Ian fitted the electrics for both mains and 12V. This includes 230V sockets for the water heater, microwave and kettle. 12V for the fridge, TV and Bluetooth amp. The lights are all LED, with a colour changing strip light in the ceiling. The leisure battery has a solar charger a mains charger and a B2B charger so we can use powered and un-powered pitches.

Jason fitted the clean and waste waters tanks underneath the van and drilled the holes for the plumbing.

IMG_1028

Next we built the kitchen units, and fitted the sink and double hob into the worktop.

The gas bottle has a door at the back which can be accessed from the side van door when open.

The cupboards have shelves for food, and space for a bin.

Little touches like the spice rack on the back of the sink for washing up liquid etc really make a difference and use wasted space.

The wall cupboards have holes for the crockery and mugs, and a magnetic knife strip holds knives when not in transit.

We then built around the bed base and put in the side extension, and ordered the bed foam, 4″ of hard foam laminated to 2″ memory foam, cut to size. I covered these in the fabrics I had bought.

Jason fitted the table base and we made the table and a storage space for it in the wardrobe.

He also put the stickers on the sides, to comply with DVLA requirements.

Getting near to finishing, we built the wall cupboards either side, and fitted the TV.

I sewed the curtains, adding small magnets to the edges so they stay in place, and lining them with blackout fabric.

IMG_3010

As we had now all the requirements for the DVLA we sent off the registration and it quickly came back declaring Connie to be a motor caravan. Success!

We were now ready to give Connie her first trip out – just a one night stay not too far from home.


I’m sure I have missed some of the process, but we have enjoyed 3 months of labour, and are delighted with the results, she is warm and quiet and comfortable, so look forward to our trips out in Connie.

IMG_2838

PS – One addition I needed was a G&T shelf on the back door – success!

IMG_3009