Scotland NC500 and more, Week 2

We went into Dunbar the next morning, and I love the place

I trust you have read the first part of this blog Scotland NC500 and more, week 1, and you pick up our trip as we leave Inverewe gardens.

Our Saturday night was spent at Ullapool. where the site is right next to the town, on the shoreline. There is a walk down to the shore where the Puils had a great time running through the dunes.

The views from the site are spectacular, especially under the clear blue skies.

We ate fish and chips on the shore in the sunshine.

The road from here goes inland, and is more moors, but when you reach Loch Assynt you find Ardvreck Castle.

DSC_1840

Can there be a more typical ruin? And with a waterfall across the road for added interest.

The coast road then follows a B road around the next part, and rejoins the A road near Unapool. For the past few days we had been kept company by drivers following the ‘Knights of the Islands 2019’ road trip, with their vehicles all over 20 years old.

We met some on various site and view points.

Finally we reached the North Coast, and stayed at Sango Sands, again, right on the coast, with a walk down to the beach.

This had to be my favourite beach, with wild waves crashing on looming rock, and 2 crazy beasts dashing around like loons.

No wonder the van is full of sand! But I declared this our Happy Place and would happily have stayed all day/week.

After a morning bacon buttie, and another visit to the beach, we took the short trip to a nearby beach where enterprising souls had set up a Zip wire across the bay.

We had to have a go!

DSC_1894
Looking across the bay

It was a peaceful glide, enjoying the views across the bay.

Adrenaline fix over, we continued along the top of Scotland, with wilder scenery but still many great beaches.

Our site for the night was Thurso, but as we had made good time, we headed first for John O’Groats, a tacky touristy place with a quaint harbour, for ice cream, and Signpost selfies.

DSC_1903
Reggie at the signpost
DSC_1904
John O’Groats harbour


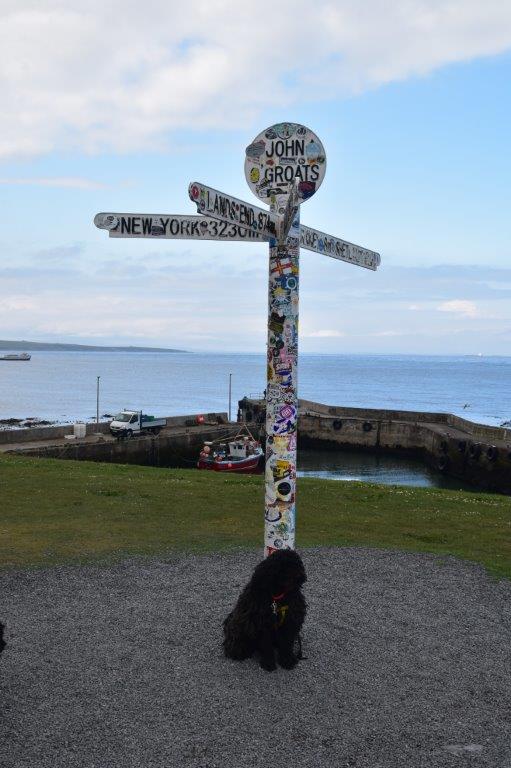
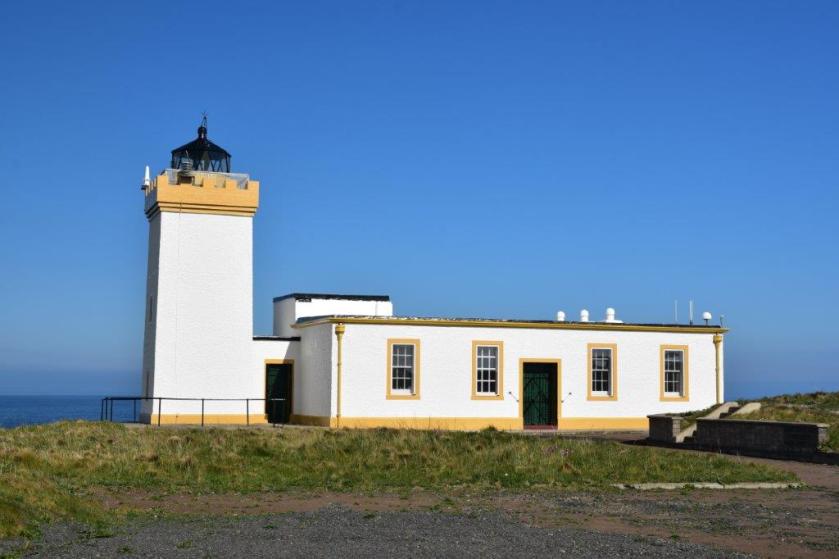
Then we continued to the real top of Scotland, to Duncansby head, with its lighthouse, and true end of the country feel.

DSC_1908
Duncansby Lighthouse
DSC_1910
Stacks

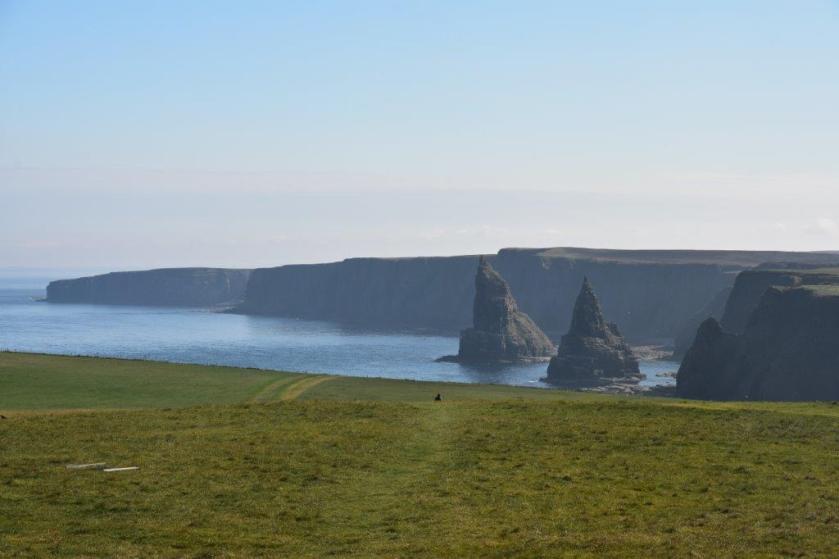
There were many people looking out for Dolphins and whales, but we didn’t see any. However, 2 Orca were spotted from the ferry here the very next day.

Thurso Bay site was yet another shore site, this time with steep cliffs down to the beach, and a short walk into town. We also found that the nearby Lidl was open on a Sunday evening, so restocked our cupboards.

From here, everything goes downhill, or South anyway.

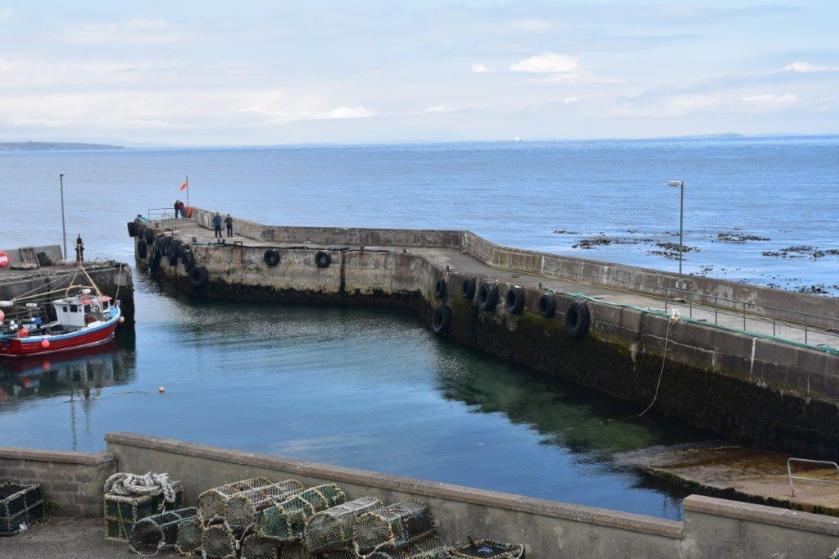
The coastline down the east of Scotland Highlands is more about the fishing industry, with Herring harbours and fish farms.

One delight was Dunrobin Castle, this one is not a ruin, but a fairytale castle.

The road crosses some spectacular bridges, and the scenery changes constantly. However, drizzle was starting to arrive after a quick visit to Inverness.

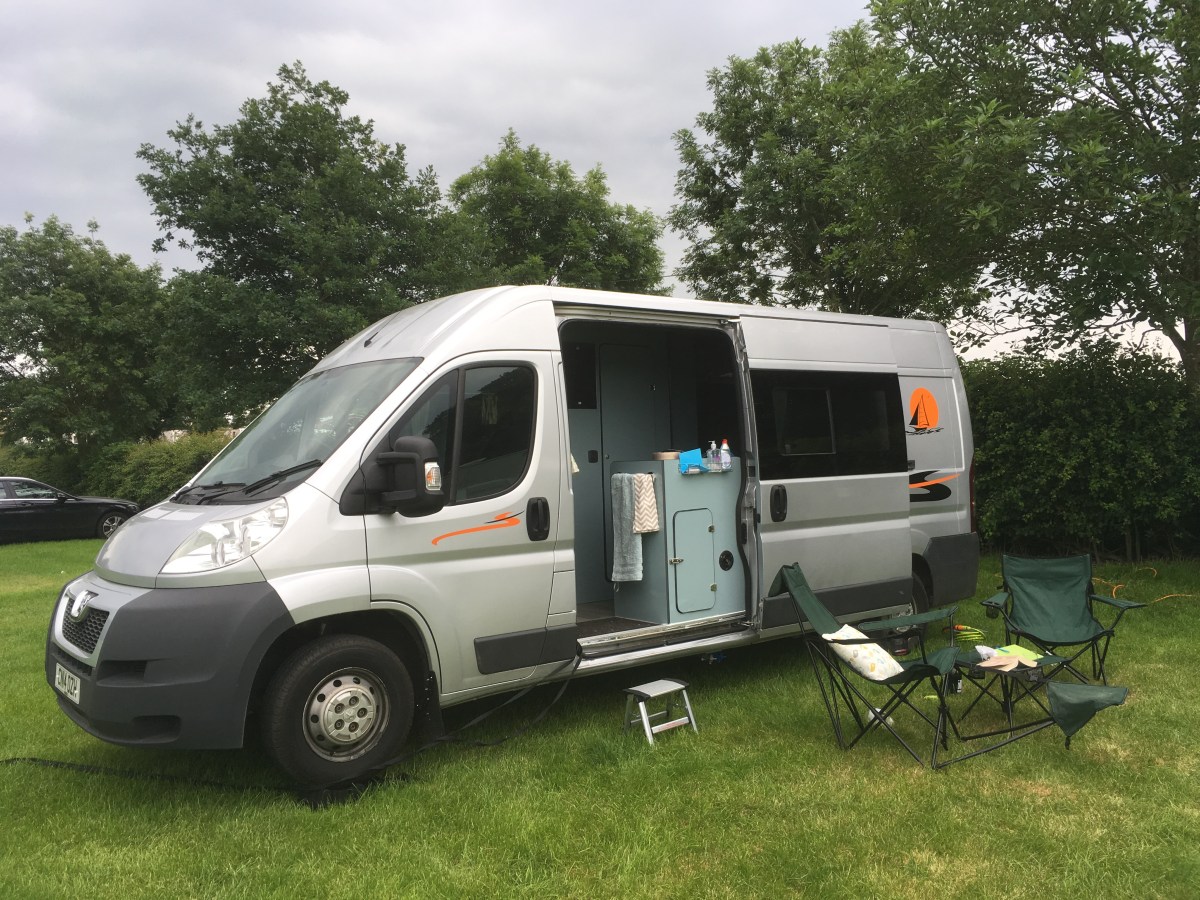
Our next 2 nights were in Glenmore near Aviemore. I was expecting a small quiet site in the Forest, as this is run by Camping in the Forest, a joint venture between Forestry Commision and the Camping and Caravanning Club, but this was the largest site we visited,and we were close to a shop and bar. It was also raining, and our pitch was a puddle. The site was quiet and the staff very friendly and helpful.

To cheer us up, we spotted a red squirrel a few feet from the van, but he scuttered off before I could grab my camera.

Determined not to let this weather stop us, we cooked a hearty meal onboard Connie, and the next morning the rain stopped for long enough for us to walk around the Loch, and after lunch at the non-dog friendly visitor centre, we walked up to the green loch, An Lochan Uaine, despite the shower that turned into rain.

IMG_0525

A quick visit into Aviemore before we set off, and the weather brightened as we headed south.

We crossed the new Forth bridge, but panels along the bridge prevented any reasonable photos.

In bright warm sunlight we reached Dunbar. The site is high on hills past the town, with great views across. We quickly emptied the wet awning and dogs beds, towels etc. out onto the bank and with a stiff breeze, soon had everything dry again, while a skylark sang away just above our heads.

The site has its own small castleIMG_4007

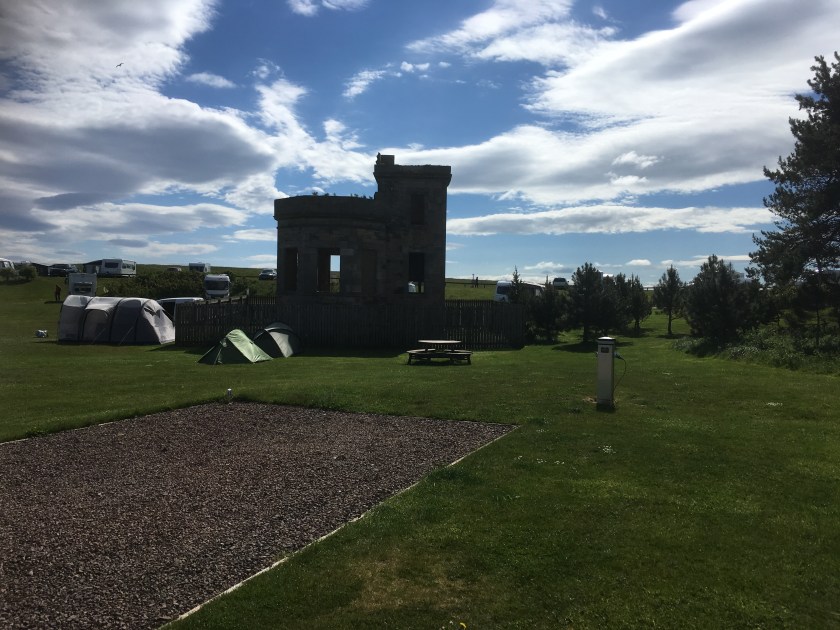
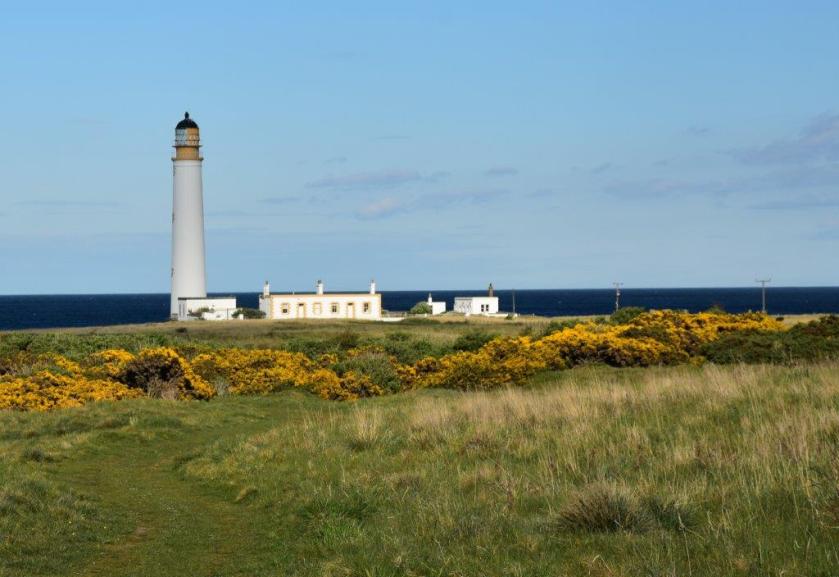
and a walk from the back of the site takes you to the lighthouse.

DSC_1939

As the site was not in town, we went into Dunbar the next morning, and I love the place.

It has a great little castle, very cleverly upgraded with information and gardens, and a small amphitheater where they hold concerts, a working harbour, and other interesting shops and buildings.


Next stop was St Abbs, with the intention of another lighthouse visit, but we decided against the walk round, and just visited the harbour and shops instead.

DSC_1956
St Abbs church
DSC_1957
Gate with St Abbs head
DSC_1958
St Abbs harbour
DSC_1960
2 Puli waiting for us outside the visitor centre

Lunch at the cafe near the car park, and off on the road again.

We followed the coast road down past the wonderful Northumberland castle of Bamburgh, Dunstanburgh and Alnwick, and views across to the Farne Islands and Holy island. A leg stretch and run on Seahouses beach refreshed us all.

Our last night was at a small working farm site in Gibside, Rowlands Gill, with views across the green farmland, and horses and sheep in the nearby fields.

From there it was a walk on Seaham beach, where I had stiff competition for my sea glass collecting, but still managed a few very pretty  items. Ian said most people on the beach had their heads down.

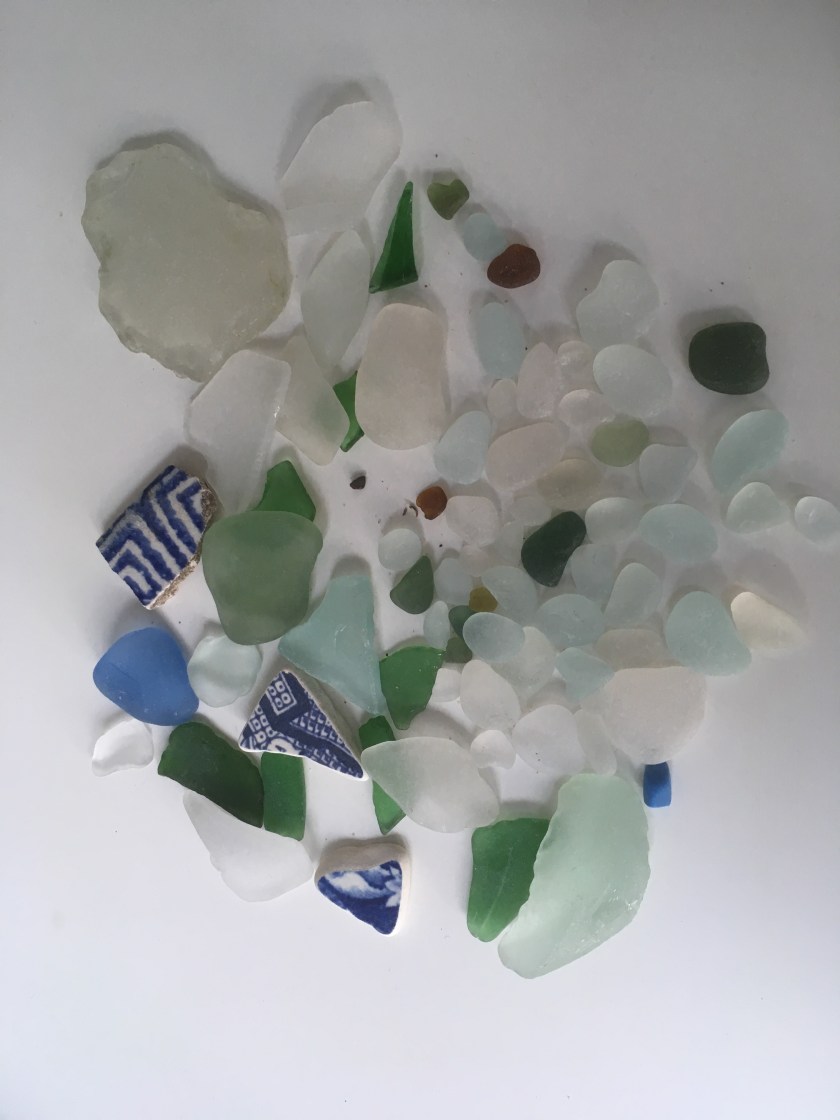
Further research says this is one of the worlds best sea glass beaches, as a glass factory used to sit at the top of the cliff and multicoloured waste scraps were thrown away into the sea. I didn’t find any of these wonderful, prices, but I will return to this beach whenever I can.

DSC_1974

And then through the Yorkshire moors and home. Two happy sunwashed humans and 2 sandy happy tired Pulik, with loads of great memories and many photos.

One thing I failed to mention is that at almost every site and pit stop we heard cuckoos calling, and skylarks were everywhere.

But we must start planning our next trip with Connie already, once we have removed the sand from inside Connie and the dead flies from the windscreen.

Connie the Campervan

So begins our adventure with Connie


Having taken early retirement. and needing a new project to fill our time, we finally decided to take our son-in-laws advice and buy a van, and convert it to a camper.

With Jason’s help – he works in the motor trade, we found a silver Peugeot Boxer L3H2 van, with side and back windows, and a gas heater and decent mileage. We had decided that a retro cramped van was not our style, and wanted comfort and space, and room for the men to stand up.

So begins our adventure with Connie.

InkedIMG_2576_LI

Our first step to the conversion was a trip to the Camping and caravan show at the NEC, Birmingham, to get ideas. This helped enormously in our final design.

We opted for a bed/settee across the back, kitchen down passenger side in front of side door, and shower room and fridge etc along the drivers side.

So we now had ideas and a van, and we hit Ebay to get stuff, and I mean LOTS of stuff.

IMG_0647

So now we had to start work, so we could reclaim the spare bedroom.

First step was to fit a reversing camera, and Jason and Kirsty replaced the side door window with an opening window as the kitchen would be along that side.

Second step was to remove the existing tatty ply boarding, and start over again with good insulation.

First we put up Dead Mat sound insulation, and this proved worth every penny, as the previously rattly van was now quiet to drive.

Next we put in 2 layers of Celotex insulation, and used recycled Plastic Bottle loft insulation in the small spaces.

At this point the wiring plan had to be completed, and first fix wires installed, making sure wires were fed through struts rather than just behind insulation. Extra wires were also fed through in case the design changed.

We then cut new side panels from 9mm ply and carpeted the panels with light grey carpet lining.

Next step was to fit a bed – we had planned to build one from wood, but when we saw this ready made metal bed we opted for that instead. As we like our comfort, we left space at the back to extend the width of the bed to King size.

IMG_2598

This was firmly bolted to the side panels and to the floor.

Our plan allowed some room for a small hanging space next to the bed and then the shower room. As we had bought a Thetford C402 Cassette toilet, we had to work out where the door would go, and work around that to position the shower room.

Once we knew roughly where it was going, we put up the back wall against the driver side wall of the van, and covered it with white PVC sheeting ( it has a protective blue film at this stage) cut to size.

Then we checked the toilet fitted, and bravely cut a hole in the van for the door.

Well done Jason!

A timber frame was then built around the toilet and shower base, the PVC fitted inside, heating gently with heat gun to bend the top to fit, a ceiling put in place and the walls insulated (for sound!).

Next was fitting the opening roof fan. These are NOT designed for van roofs, but we got there in the end, after our first try leaked. While we were working on the roof, we fitted a Solar panel, so we would not be reliant on mains power.

Wiring for the fan and bathroom light was also fitted at this stage.

Next we had to fit the 15mm lightweight 5 ply laminate boarding outside the shower room.

I had chosen some fabric for the seats, and we were planning on a light grey wood effect panel, but when we viewed the sample I didn’t like the shade as it was too beige, and instead opted for ‘Blue metal’, a duck egg blue laminate with a metallic sheen.

The board is in large 2500 x 1220 mm boards and was not cheap, so first we cut a cardboard template, then transferred that to hardboard, before cutting the board. I found that my circular saw was too rough for the job and resorted to a jigsaw, with good narrow laminate blades.

Then we laid Wood effect laminate flooring for a tough, easy clean finish.

We had bought the recommended drill blade for fitting the t-strip, but found it hard to work with, and it wouldn’t fit into corners, so got a new small router and special t-strip blade. This worked brilliantly, and most of the t-strip did not need gluing.

The light fitting in the shower has 2 settings, bright and dim, so mid night trips to the loo don’t wake the whole site. A standard shower is fitted, with plumbing going out the back wall into the wardrobe.

Next we decided to fit the fridge and microwave, as they were the largest objects lying around. We planned to put the microwave at head height, but once we saw it could fit above the fridge we went with that design. The fridge is electric low powered, so doesn’t need gas, and had a removable ice-box. The solar panel will run the fridge on sunny days.

The microwave can be removed, and the space down the side was made into a 2ltr bottle store, topped off with 18mm worktop in grey.

Ian fitted the electrics for both mains and 12V. This includes 230V sockets for the water heater, microwave and kettle. 12V for the fridge, TV and Bluetooth amp. The lights are all LED, with a colour changing strip light in the ceiling. The leisure battery has a solar charger a mains charger and a B2B charger so we can use powered and un-powered pitches.

Jason fitted the clean and waste waters tanks underneath the van and drilled the holes for the plumbing.

IMG_1028

Next we built the kitchen units, and fitted the sink and double hob into the worktop.

The gas bottle has a door at the back which can be accessed from the side van door when open.

The cupboards have shelves for food, and space for a bin.

Little touches like the spice rack on the back of the sink for washing up liquid etc really make a difference and use wasted space.

The wall cupboards have holes for the crockery and mugs, and a magnetic knife strip holds knives when not in transit.

We then built around the bed base and put in the side extension, and ordered the bed foam, 4″ of hard foam laminated to 2″ memory foam, cut to size. I covered these in the fabrics I had bought.

Jason fitted the table base and we made the table and a storage space for it in the wardrobe.

He also put the stickers on the sides, to comply with DVLA requirements.

Getting near to finishing, we built the wall cupboards either side, and fitted the TV.

I sewed the curtains, adding small magnets to the edges so they stay in place, and lining them with blackout fabric.

IMG_3010

As we had now all the requirements for the DVLA we sent off the registration and it quickly came back declaring Connie to be a motor caravan. Success!

We were now ready to give Connie her first trip out – just a one night stay not too far from home.


I’m sure I have missed some of the process, but we have enjoyed 3 months of labour, and are delighted with the results, she is warm and quiet and comfortable, so look forward to our trips out in Connie.

IMG_2838

PS – One addition I needed was a G&T shelf on the back door – success!

IMG_3009